
For those installing Version 1.4, please keep the following notes in mind:
1. Please update your users’ security rights by updating the System Role with the .XML file provided in the user guide below.
2. Instruct your users that they must set defaults for Attachment types prior to being presented with the option to save attachments to Blackbaud CRM
- Plugin Installation & Configuration
- Plugin Features
- General Information
- Email Features:
- Constituent Summary
- File General Interaction
- File a Contact Report
- File an Unplanned Contact Report
- Calendar and Tasks Features:
- Constituent Summary
- Edit Task
- Mark Complete
- Refresh Sync
- Add New Record Features:
- Add Constituent
- Add Email
- Add Interaction
- Add New Plan Step
- Add New Stewardship Plan Step
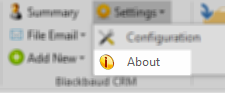
- Plugin Settings:
- Configuration
- About
- Blackbaud CRM Security Requirements
- Release Information
Plugin Installation & Configuration
*Before Installation – Ensure you have the necessary Security rights in Blackbaud CRM to use this plugin. Your System Administrator can help you with this. In addition, please be sure that Blackbaud CRM is properly configured
System Administrators – read our Blackbaud CRM Required Security and Configuration Settings section for more information.*
The instructions for installing and configuring the plugin below assume that each individual user is installing and configuring the plugin. If you would like to use our Mass Install or Shared Workstation (Per Machine) installations, please click on the following links:
Installation Instructions (Per User – Mass Install)
—Common.json File Required for Mass Install
Installation Instructions (Per Machine)
Individual (Per User) Installation Instructions:
Download the latest version of the Outlook Plugin from our downloads page (or use the link provided to you). The file extension will end in .msi. Either save this file or choose run when prompted.
Prior to beginning the installation, please ensure all Outlook windows are closed.
The Blackbaud CRM Outlook Plugin Setup Wizard should appear. Follow the on-screen prompts to install the plugin.

Click Next.
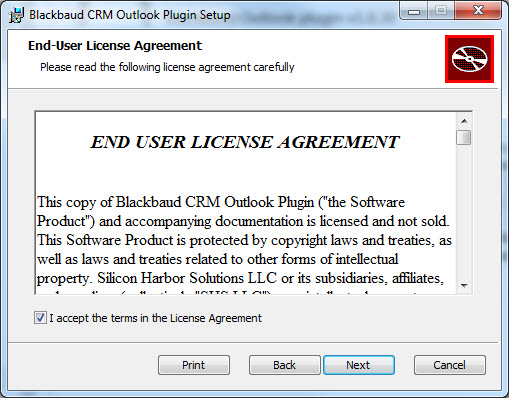
Please read and agree to the End User License Agreement by marking the checkbox and click Next.

Select a folder to use to install the Outlook Plugin. Click Next
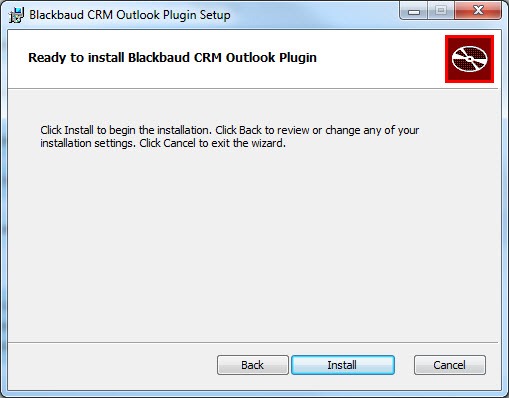
When you are ready to install, click Install.
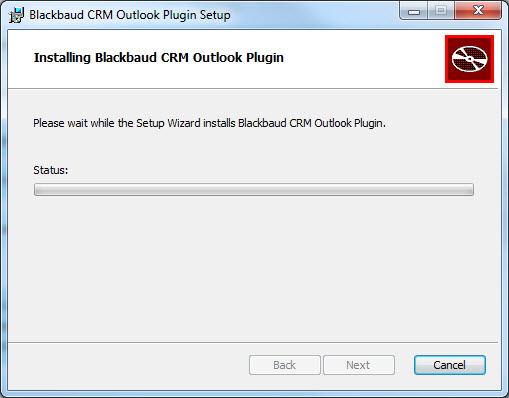
A status screen will show you the installation progress.
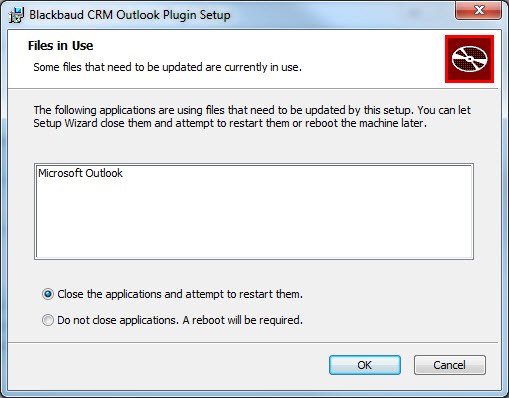
If Outlook was not closed prior to install, the installer will request to close Outlook to finish the installation. Make a selection and click OK.
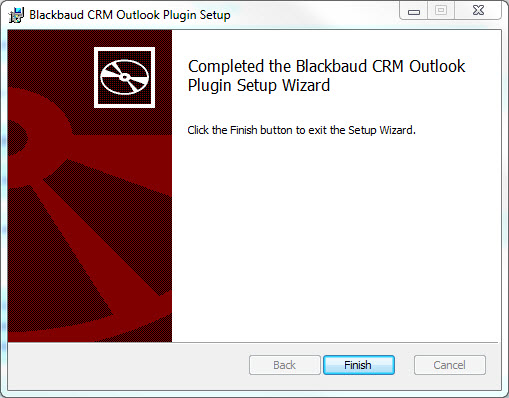
Once the installation has finished or was canceled, you will see a screen showing installation success or failure. Click Finish.
Open Outlook. When Outlook loads, you will be prompted for your license. Select Activate Trial Version to begin your 7 day free trial. If you have been provided with a License Key, enter the license key and select Activate Full License.
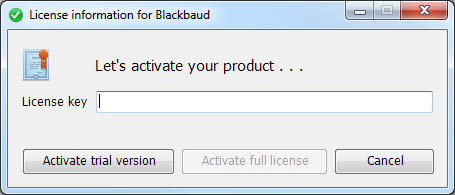
After entering your key or starting your trial, you must restart Outlook before continuing.
After restarting Outlook, you will be prompted with the plugin configuration screen.
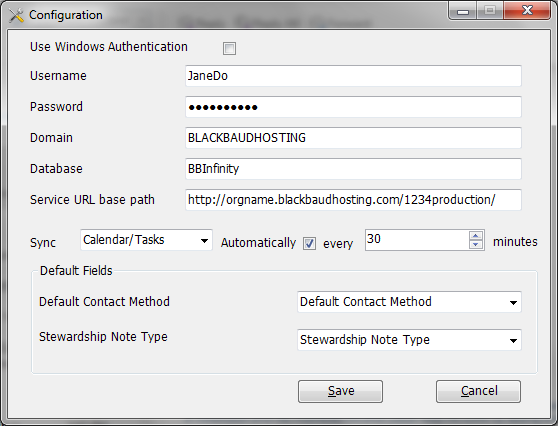
Enter the Credentials that you would use you access Blackbaud CRM. Please contact your system administrator if you do not know some of these values.
Use Windows Authentication: If your organization uses Windows Authentication or Active Directory Integration to access Blackbaud CRM, the plugin can also inherit your Windows credentials to authenticate with Blackbaud CRM.
Username: The username you enter into Blackbaud CRM – do not include the domain. Not required with Windows Authentication
(For Example – BLACKBAUDHOSTING/JaneDo – JaneDo is the username)
Password: Your password for Blackbaud CRM. Not required with Windows Authentication.
Domain: The domain used for your Blackbaud CRM account. Not required with Windows Authentication.
(For Example – BLACKBAUDHOSTING/JaneDo – BLACKBAUDHOSTING is the domain.)
Database: This is the name of your Blackbaud CRM database.
(For Example: BBInfinity)
Service URL Base Path: This is the URL for your Blackbaud CRM environment. Include everything before the “WebUI”. This may vary depending on your configuration. This value must end with a “/”.
(For Example: http://organizationname.blackbaudhosting.com/1234Production/”)
Sync Tasks Option: Use this option to select what sync features to use with the Plugin. WARNING: Changing this value can delete existing options if changed after prior usage of the plugin. Sync Options are as follows:
- Calendar/Tasks – Both Calendar Appointments and Tasks (To-Do) will appear in Outlook.
- Calendar Only – Only Appointments will be created on your Calendar by the Plugin. Tasks must have a start/end time to appear on your calendar.
- Tasks Only – Only Tasks will be created on your To-Do list in Outlook by the Plugin.
- Off – None of your Blackbaud CRM tasks will appear in Outlook.
Sync Tasks Automatically: Checking this box will allow the plugin to automatically refresh your tasks every 30 minutes. During this refresh period, your Outlook may become slow for a few seconds. You may turn this on/off at any time. You can also configure the 30 minutes to a time period of your choosing.
Default Contact Method: After saving your configuration successfully for the first time, you may later return to the configuration screen to set a default contact method to use when filing your emails as interactions or contact reports.
Default Stewardship Step Note Type: After saving your configuration successfully for the first time, you may later return to the configuration screen to set a default Stewardship Note Type to use when filing your emails as Stewardship Step contact reports. This is a required field in order to file Stewardship Step Contact Reports.
Hit Save when finished. A prompt will tell you whether or not your credentials have been entered correctly.
If you cannot enter your credentials correctly, please hit cancel and contact your system administrator.
Plugin Features
General Information:

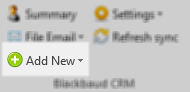
From the main Outlook Mail Ribbon, you will have access to general Plugin Settings, the File Email features, the Add New Record features, and the ability to Refresh the Sync updating your Calendar Appointments and Tasks.
Within a received or sent email, the email based features will show slightly differently.
Many of our features automatically search for the email address within Blackbaud CRM and require that an email address be found for the plugin to work. If a matching Email cannot be found, you will receive an error message. Our plugin searches primary and non-primary email addresses on all constituent records (regardless of type). You can search for constituents if a constituent is not automatically found.

Also, if multiple constituents are found, you will be prompted to select which constituent you want to view.

Email Features:

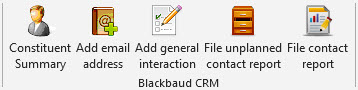
The email features are specifically designed to allow users to quickly save a copy of that email within Blackbaud CRM as either an Interaction or Contact Report for the constituent who sent or received the email.
1. Constituent Summary
The Constituent Summary button will bring up a Summary View Form from Blackbaud CRM to show you details about the constituent.

The Constituent Summary View Form will allow you to see important information about the constituent, including LookupID, Primary Email, Primary Phone Number, Primary Relationships, and Active Constituencies.
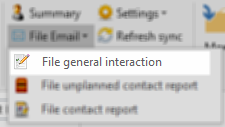
2. File General Interaction
When you send/receive an email from your constituents, you will want to track that email as an interaction within Blackbaud CRM. You may also want to create a task for someone else to complete. Selecting File General Interaction will allow you to create interactions within Blackbaud CRM.
After clicking File General Interaction, you will be presented with the Add an Interaction form. For your convenience, the body of the email is copied into the comments field. The interaction has also automatically populated Expected and Actual Dates/Times and marked the interaction as Complete. In addition, you are added as the interaction owner. If you have configured a default contact method, that will also automatically populate. You will need to select any other required fields as defined by your organization’s business rules.
You may also change the status to Pending and assign the interaction to another user for follow up. Alternatively, you can also select Add New Interaction for creating pending interactions in the future.
3. File a Contact Report
From an email in your inbox or sent items folder, selecting the File a Contact Report button will allow you to mark a plan step as complete and file a contact report in Blackbaud CRM.

After selecting the File an Contact Report button, you will be presented with a list of all of a constituent’s Prospect Plans, Stewardship Plans, and Funding Request Plans. You will then be presented with a list of all Pending steps within that plan.
Select the appropriate Prospect Plan Step and hit Next. The File a Contact Report form will appear.
The body of the email will automatically populate the comments field. Actual Date and Time will also be populated automatically. If you have configured a default contact method, that will also automatically populate. You will need to select any other required fields as defined by your organization’s business rules.
4. File an Unplanned Contact Report
An Unplanned Contact Report is filed when an interaction takes place with a constituent that is related to a Prospect Plan but not a pre-defined step in that plan.
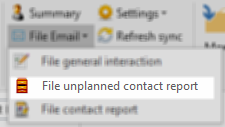
From an email in your inbox or sent items folder, selecting the File an Unplanned Contact Report button will present you with a list of all of a constituent’s Prospect Plans. Select the appropriate Prospect Plan and hit Next. The Add an Unplanned Contact Report form will appear.
The body of the email will automatically populate the comments field. Actual Date and Time will also be populated automatically. If you have configured a default contact method, that will also automatically populate. You will need to select Stage as well as any other required fields as defined by your organization’s business rules.
Calendar and Tasks Features:
The Plugin will display your Pending Steps or Interactions as either Calendar Appointments or Tasks within Microsoft Outlook. All interactions, prospect plan steps, or stewardship steps with a Start and End Time will appear on your Calendar. Those interactions, prospect plan steps, or stewardship steps without times will appear as Tasks. Funding Request Steps will only appear as Tasks.
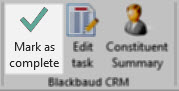
If you highlight a Calendar Appointment or a Task, or open up the Appointment or Task, you will have the options to view a Constituent Summary, Edit the Task, or Mark the task as Complete.
1. Constituent Summary
The Constituent Summary button will bring up a Summary View Form from Blackbaud CRM to show you details about the constituent.
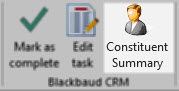
The Constituent Summary View Form will allow you to see important information about the constituent, including LookupID, Primary Email, Primary Phone Number, Primary Relationships, and Active Constituencies.
2. Edit Task
The Edit Task button will allow you to edit the interaction/plan step in Blackbaud CRM.
Depending on the type of task (Interaction, Plan Step, Stewardship Step, and Funding Request Plan Steps), you will receive a different screen from Blackbaud CRM. Comments typed into the Outlook Calendar Appointment or Task will be copied into the comments section for Interactions or Plan Steps. Changes made to the dates or times will be reflected in Outlook the next time the Refresh Sync runs.
3. Mark Complete
The Mark Complete button will allow you to mark a task/step as complete in Blackbaud CRM.
Depending on the type of task (Interaction, Plan Step, Stewardship Step, and Funding Request Plan Steps), you will receive a different screen from Blackbaud CRM. Actual Date will be automatically populated. Comments typed into the Outlook Calendar Appointment or Task will be copied into the comments section for Interactions or Plan Steps. Marking a Plan Step as complete will File a Contact Report.
4. Refresh Sync
The Refresh Sync button allows you to immediately refresh all of your Calendar Appointments and your Tasks. You will need to do this to ensure your appointments and tasks are up-to-date. The automated refresh sync (if enabled) runs every 30 minutes (or your configured time interval) .
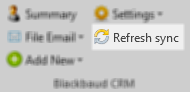

The Refresh Sync button appears on the primary Email Screen, the primary Calendar screen, or on your primary Tasks (or To-Do) Screen.
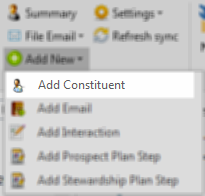
Add New Record Features:
The plugin allows users to quickly add new records to Blackbaud CRM. This means you can easily add a new constituent, add an email address to a constituent, or create a new interaction, prospect plan step, or stewardship plan step for a constituent. This feature is especially useful if you are in Outlook and need to quickly add something to Blackbaud CRM when you are on the phone or meeting someone in person but not logged into Blackbaud CRM. This feature is also useful when you want to create an future interaction based from an email.
Unless otherwise selected, Add New options do not inherit email details, with the exception of Add New Email.
1. Add Constituent
If you would like to add a new constituent to Blackbaud CRM, click Add Constituent.
If an email has been selected, the plugin will ask if you would like to inherit email details.

If yes is selected, the plugin will pull email address, first name, and last name from the email metadeta. The Add a Constituent screen from Blackbaud CRM will appear. Review/Fill out the constituent details and hit save.
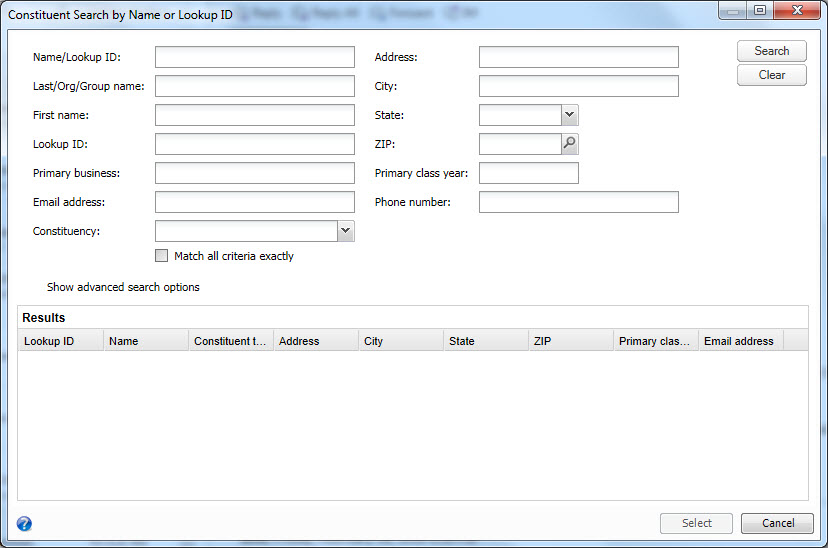
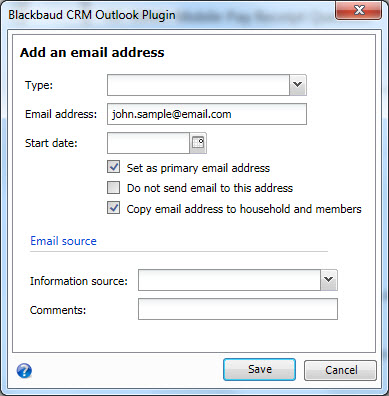
2. Add Email
If you would like to add a new email to Blackbaud CRM, click Add Email
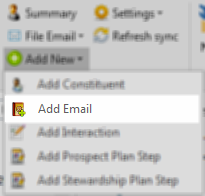
You will be promoted with a Constituent Search screen. Search for a constituent, select the constituent, and fill out the Add an Email form.
Email Address will be automatically populated (but you may change the email address manually, if you choose.)
3. Add Interaction
Selecting Add Interaction allows users to quickly add new interactions from Outlook.

This feature is useful for users who want to quickly add an interaction from a phone call or in-person meeting, to create a future interaction from an email, or when there is no email to include in the comments. This feature should NOT be used to file emails as completed Interactions.
After clicking on Add Interaction, if an email has been selected, the user will be given an option to inherit email details.
If a user selects yes, the plugin will search for a constituent. Once a constituent has been found and/or selected, email information will be populated in the comments. Users should complete the form and hit save.
If a user selects no, the plugin will allow a user to search for a constituent. Once a constituent has been selected, a blank Add an Interaction form will appear. Users should complete the form and hit save.
4. Add New Plan Step

If you would like to add a new Prospect Plan Step to an existing Prospect Plan, the Add New Plan Step button will allow users to search for a constituent, select an active prospect plan, and create a new step on that prospect plan.
5. Add New Stewardship Plan Step
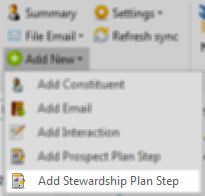
If you would like to add a new Stewardship Plan Step to an existing Stewardship Plan, the Add New Stewardship Plan Step button will allow users to search for a constituent, select an active stewardship plan, and create a new step on that stewardship plan.
Plugin Settings:
1. Configuration

The Configuration screen will allow you to change your Blackbaud CRM credentials, Modify the Sync feature, and set default values. You will need to change your credentials when your Blackbaud CRM password changes unless you are using Windows Authentication.
Enter the Credentials that you would use you access Blackbaud CRM. Please contact your system administrator if you do not know some of these values.
Use Windows Authentication: If your organization uses Windows Authentication or Active Directory Integration to access Blackbaud CRM, the plugin can also inherit your Windows credentials to authenticate with Blackbaud CRM.
Username: The username you enter into Blackbaud CRM – do not include the domain. Not required with Windows Authentication
(For Example – BLACKBAUDHOSTING/JaneDo – JaneDo is the username)
Password: Your password for Blackbaud CRM. Not required with Windows Authentication.
Domain: The domain used for your Blackbaud CRM account. Not required with Windows Authentication.
(For Example – BLACKBAUDHOSTING/JaneDo – BLACKBAUDHOSTING is the domain.)
Database: This is the name of your Blackbaud CRM database.
(For Example: BBInfinity)
Service URL Base Path: This is the URL for your Blackbaud CRM environment. Include everything before the “WebUI”. This may vary depending on your configuration. This value must end with a “/”.
(For Example: http://organizationname.blackbaudhosting.com/1234Production/”)
Sync Tasks Option: Use this option to select what sync features to use with the Plugin. WARNING: Changing this value can delete existing options if changed after prior usage of the plugin. Sync Options are as follows:
- Calendar/Tasks – Both Calendar Appointments and Tasks (To-Do) will appear in Outlook.
- Calendar Only – Only Appointments will be created on your Calendar by the Plugin. Tasks must have a start/end time to appear on your calendar.
- Tasks Only – Only Tasks will be created on your To-Do list in Outlook by the Plugin.
- Off – None of your Blackbaud CRM tasks will appear in Outlook.
Sync Tasks Automatically: Checking this box will allow the plugin to automatically refresh your tasks every 30 minutes. During this refresh period, your Outlook may become slow for a few seconds. You may turn this on/off at any time. You can also configure the 30 minutes to a time period of your choosing.
Default Contact Method: After saving your configuration successfully for the first time, you may later return to the configuration screen to set a default contact method to use when filing your emails as interactions or contact reports.
Default Stewardship Step Note Type: After saving your configuration successfully for the first time, you may later return to the configuration screen to set a default Stewardship Note Type to use when filing your emails as Stewardship Step contact reports. This is a required field in order to file Stewardship Step Contact Reports.
Hit Save when finished. A prompt will tell you whether or not your credentials have been entered correctly.
If you cannot enter your credentials correctly, please hit cancel and contact your system administrator.
2. About
The About screen gives you information about your version of the Blackbaud CRM Outlook Plugin. It will show you the Plugin Version you have installed, which email this instance of the plugin is licensed to, the type of license used, and (if applicable) information about the trial license, such as expiration date and status.
You can also send support logs directly to Silicon Harbor Solutions using the Send Support Logs button.
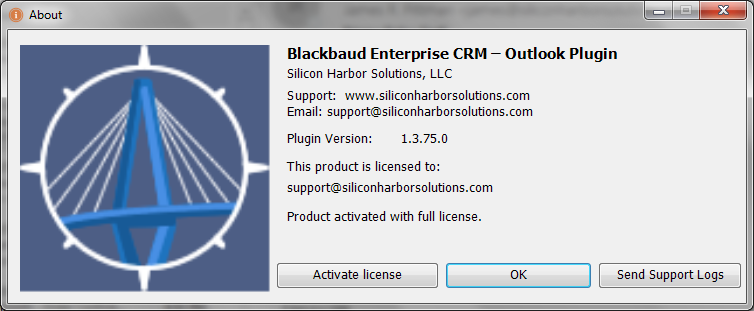
In addition, you have the ability to activate your license from this screen. To do so, click Activate License.
From this screen, you can activate your 30 Day Free Trial (if not yet used) by clicking Activate Trial Version or you caEn activate your full license by typing in the License Key provided by your System Administrator or by Silicon Harbor Solutions and hitting Activate Full License.
Blackbaud CRM Security and Configuration Requirements
Our Outlook Plugin for Blackbaud CRM inherits security settings from your user security in Blackbaud CRM. This means that plugin users will still only have the rights to view constituent information and interact with constituent records that they are granted access to.
In order to use the full feature set of the plugin, certain feature security rights are required. Download our System Role Configuration file and ensure each plugin user has been given the system role created by the file.
Blackbaud CRM System Role
This document can be imported into Blackbaud CRM to allow you to easily assign the necessary rights to your users to fully use this plugin. (Right Click the link and click Save As to download the file.)
Finally, each user must be linked with a corresponding constituent record in Blackbaud CRM.
Blackbaud CRM must also have certain configurations available for the plugin to successfully work. This document highlights the required configurations necessary to be present in Blackbaud CRM to properly use this plugin: Blackbaud CRM Configuration Requirements
Release Information
V 1.4 (Released May 2018)
– Upgraded Authentication Routine to TLS 1.2
– Updated Configuration User Interface
– Ability to Clear Configuration Details to Fully Reset Plugin
– Removed Default Setting for Automatic Sync
– Expanded Proxy Configuration Options
– Ability to quickly Log a Phone Call as an Interaction
– Ability to default Contact Method for Phone Calls
– Sync Option to allow for Planned Steps to be synced with Calendar and To-Do List
– Allow Users to Override User Assigned Constituent
– Ability to add Attachments to Interactions/Contact Reports
– Ability to default Attachment type for Interactions/Steps/Funding Requests
– Ability to default Attachment type for Stewardship Steps
– Ability to select/de-select Attachments and modify type prior to Save.
– Ability to use Okta Single Sign On for Authentication
– Renamed Calendar Add Interaction feature to Add Meeting/Task (Interaction)
– Numerous Bug Fixes and Performance Improvements
V 1.3 (Released June 2017)
– Updated Main Screen User Interface
– Windows Authentication (using Active Directory for authentication with Blackbaud CRM)
– Ability to file Contact Reports for Funding Request Plans (Grants)
– Ability to file Contact Reports for Stewardship Steps. Overcoming Blackbaud CRM limitations, Stewardship Plan Step contact reports are saved as notes on the Stewardship Plan Step record.
– Additional Add Option: New Stewardship Plan Step
– Ability to default Stewardship Note value for Stewardship Contact Reports
– Stewardship Steps with Start/End times will now appear on calendars as appointments.
– Add Option Logic: Ability to inherit details from a selected email for Adding New Constituent or Adding New Interaction
– Participants (multiple email addresses) now automatically added on Contact Reports. Interaction Participants functionality improved.
– Categories assigned to Filed Emails (with status = Successful Filing/Failed Filing)
– Ability to search for constituents when email not found by the Plugin.
– Ability to add Planned Steps to Pending Steps datalist when searching for steps to File a Contact Report
– Multiple Constituent select screen now shows Lookup ID for easier constituent selection
– Filing Status saved to Emails (Success or Failure)
– Ability to change Tasks sync option: Calendar/Tasks, Tasks only, Calendar only, Off.
– Ability for users to send Support Logs directly to Silicon Harbor Solutions.
– Mass Install Ability now includes ability to push License Key and some default settings.
– Users behind firewalls can add proxy information to use the plugin.
– Additional Bug Fixes and Performance Improvements
V 1.2 (Released December 2016)
– Ability for IT administrators to do Machine Based Installs (for Shared Workstations)
– Calendar Integration – Interactions and Prospect Plan Steps with Start/End Times appear on your Calendar
– Additional Add Options: New Constituent, New Plan Step, New Interaction
– Configurable Default Contact Method Values
– Configurable Sync Times
– Performance Improvements, Click Reductions, and Bug Fixes
V 1.1 (Released August 2016)
– All Email Addresses are now included in functionality (Primary Emails ONLY were utilized in v1.0)
– Ability for IT administrators to Mass Install
– Improved upgrade functionality
– Bug Fixes & Performance Improvements
V 1.0 (Released Late March 2016)
– Review Constituent Summary
– Add Constituent Email Addresses
– File Interactions, Contact Reports, and Unplanned Contact Reports.
– Interactions, Prospect Plan Steps, and Stewardship Steps appear as Tasks in Outlook